Thursday, August 18, 2016

Half Kneeling: For More Than Tebowing


As I alluded to in the previous post, this post is all about the "Half Kneeling" or 90/90 position.  So take a knee while I explain the value of this position and why so much of our training occurs here.


Half kneeling offers a lot to our training.  It...
- trains stability through our hips. Something you'll find useful when doing split stance or single leg exercises. Also useful when you don't want to fall down and feel dumb.

- combines a stretch of the hip flexors with exercise, making more effective use of your time.  Many of us sit for the majority of our day, and as a result our hip flexors are very tight.  A proper half kneeling position with the glute of the down knee engaged can go a long way to correct this imbalance.

- utilizes fewer joints offering greater training specificity. If we are doing a half kneeling exercise, you can bet that stability is a major factor, as well as strength.  By kneeling, we take joints like the ankle and knee out of the equation, allowing you to focus on pristine movement quality through your upper half.

The Set Up
- Kneel in a position that allows both legs to assume approximate 90 degree angles.  I say approximate because for many this position will work better if they pull their front foot back a bit, allowing a slight angle of the shin.  You should be able to feel all of the floor beneath your front foot.

- Now from a front view the joints of the lower body should be stacked.  Stacked joints are happy joints!  What we are looking for is the knee above the ankle and the hip behind the knee.  From the front I shouldn't be able to see your back foot.

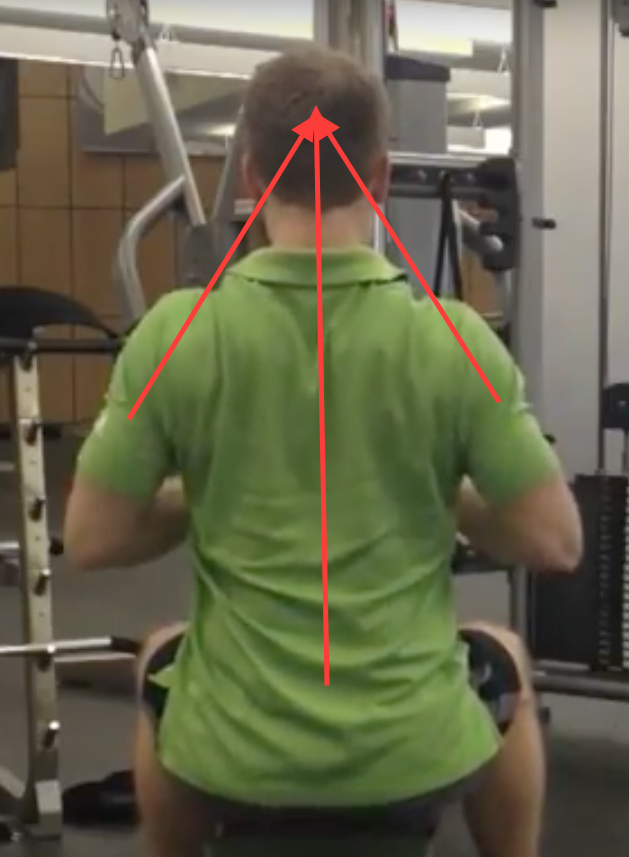
- Once good position has been established, your job is to maintain this position in spite of what your arms may be doing. Stability!


Common Errors
- Flexing the hip or failing to engage the glute of the down knee.
- Over extending at the hip.  Instead keep your hip stacked over your knee, not your knee behind your hip.
- Hip Hike.  Should you notice one hip seems to sit higher than the other in the half kneeling position, try to correct this yourself, but should that not work, another remedy is the elevate the down knee by adding extra padding.

Thoughts from smart folks on the half kneeling position...

Hacks for Half Kneeling - Mike Robertson
Importance of Half Kneeling Position - Dr. Quinn Henoch
The Half Kneeling Position - IFAST (Indianapolis Fitness and Sports Training)

Wednesday, August 17, 2016

Landmine Press


What is it?
- The Landmine Press is an upper body pressing exercise involving a vertical press and one of the first unilateral exercises you're likely to run into while training with me.

Why should I care?
- Regardless of what Outkast would have you believe, throwing your hands in the air is something that deserves your care.  As you're surely aware by now, maintaining neutral spine during an exercise is paramount to your success and well being.  That being said, overhead pressing is an activity you have to earn the right to do.  Many trainees don't initially possess the requisite mobility and stability needed to press overhead safely, and the landmine press, allowing for vertical pressing at a less severe angle, provides a great stepping stone for trainees looking to earn the right to press overhead in other exercises.

How to?
- Assume the 90/90 or Half Kneeling position(refer to the next post for a more nuanced look at this stance). With the end of the barbell near your shoulder, press it away from you and finish by reaching.

Cues
- Get in the 90/90(Half Kneeling) position by bracing and tightening the cheek of the down knee
- With the barbell just in front of your shoulder, press the weight away from you
- Finish the press with a slight reach
- Return to start position

The key here, and with all half kneeling exercises, is to limit extraneous movement.  Brace tight and avoid rotating, flexing, or extending at the low back in an effort to move the weight.  You know...maintain neutral spine.

Variations
- Half Kneeling Landmine Press

- Standing Landmine Press
Eventually we hope to transition the skills acquired with the landmine press to strict overhead pressing like here...

and here...

I can hardly tell the difference between us.

Tuesday, August 16, 2016

Chin Ups and Pulldowns: Monkey Business


"I got you these...because your pull ups look like crap."

What is it?
- The Chin Up(palms facing toward you) and Pull Up(palms facing away) are upper body movements involving pulling in a vertical plane and they are the first of the foundational movements requiring you to stabilize through the core without the use of the floor.

Why should I care?
- Because if you're like me you spent most of Silence of The Lambs wondering, "Why doesn't she just climb out of the well?"  Also, vertical pulling is another incredible way to strengthen the muscles of your back and provides a great strength benchmark for all trainees.  I implore you all the put in the necessary work to achieve your first pull ups/chin ups.  Maybe then The New York Times will stop publishing garbage like this: "Why Women Can't Do Pull Ups"

How to?
- Obviously the title of the exercise pretty much sums it up, but lets layer on a bit of specificity.  For starters, I think the chin up is poorly named.  Try thinking of these exercises as sternum ups.  In an ideal world we could all pull our chests to the bar.

Secondly, the exercise, like all the others, ought to be performed with a neutral spine.  Chin ups and pull ups rely primarily on your lats to produce the movement, and the harder the lats work the harder your abs(anterior core) have to work to keep you from extending at the low back...like this guy.

To be fair this video was made for the purpose of demonstrating poor form, so no one make fun of him! I can do it too!!!

For those interested in a detailed explanation of good Chin Up/Pull Up technique, here's Eric Cressey coming at you with all kinds of science...


For everyone else, think like a gymnast (i.e. toes in front of your nose).


Cues
- Grip the bar tightly overhead
- Brace the core by tightening glutes and stomach (i.e. toes in front of your nose)
- Pull elbows toward floor, finishing with chest on bar and elbows even with body
- Lower under control to starting position

Variations
- Chin Up (palms facing toward you)

- Pull Up (palms facing away)
For those of you wondering what happened to "toes in front of the nose", I had to modify it to "knees in front of the nose" because our chin up bar was made for wee folk and my feet hit the floor.

With all that being said, I'd like to point out that the Chin Up and Pull Up are movements that require a great deal of strength and core stability.  For those of you working your way up to your first pull up, start with the Tall Kneeling Pulldown

This variation allows you to train the same movement while you acquire the requisite strength necessary to perform your first Pull Up/Chin Up.

Superbands provide another means of training the Pull Up/Chin Up while developing your strength.

- Band Assisted Chin Up

Finally, for all the ladies out there interested in making the NY Times eat crow, I refer you to Tony Gentilcore.  No one fights on behalf of the strength of women quite like this dude.

- Chin Ups for Women Pt 1
- Chin Ups for Women Pt 2


Thursday, August 11, 2016

Squat: Take a Seat

This dude can squat.  Regardless of the fact that the bar starts over head, then lies on his chest, and finishes on his back, each movement was a squat.  Take away the bar and the major tenants of the squat remain.

What is it?
- The squat is a lower body movement involving maximal hip and knee flexion.  In other words you're sitting down.

Why should I care?
- Do you ever sit? Of course you do.  Do you ever stand?  Well the latter half of the squat is likely how you got there.  I realize this is likely coming off as patronizing but its only because I care.  We all need to sit/crouch/hunker down at one time or another and learning to do so properly can spare your knees, hips, and low back.

How to?

Cues
- Begin by standing
- Assume a base slightly outside hip width
- Brace by engaging your glutes and abdomen
- Pull your butt toward the floor and return to standing by driving the floor away with your feet
- Finish by again engaging your glutes and abdomen in the braced position

As you saw above, there are a lot of different ways to squat and I think its great to want to do them all.  That being said, I like to start clients with the goblet squat to a box.  This variation keeps the weight in front allowing for a more vertical torso during the squat(aka a squattier squat) and the box provides a safety net as well as depth gauge.

Goblet Squat to Box
Once you're comfortable squatting to a box, you can remove it and move on to these other squat variations.

- Kettlebell Goblet Squat


- Dumbbell Goblet Squat


- Front Squat


- Back Squat

- Overhead Squat

Thoughts of Goblets Squats from, Dan John - Goblet Squats 101
...and thoughts from Bret Contreras "A Set of Goblet Squats a Day Keeps the Doc Away"
...and more Goblet Squat thoughts from Mike Boyle "Dan John was Right"

Take it from me, these dudes know what they're talking about.

Movement: Tier 2


Assuming you've spent some time mastering the Tier 1 movements from earlier, its time to look at squatting as well as pressing and pulling in the vertical plane.  As always we build these movements on the foundation of a neutral spine. 

Monday, August 1, 2016

Upper Body and The Arrow


While there are tons of variations on upper body exercises, there is one factor that unifies them all...The Arrow.

First of all, a huge thank you to Mike Robertson who initially made me aware of this with the push up,
...but I noticed it as well in the chin up/pull up, the overhead press, and the row.  While the paths of these exercises may vary, they all pass through this arrow position at one point or another.


Is this the only way to perform these exercises? Absolutely not.  But for the novice lifter, I believe this set up provides a specific foundation on which to build.

Row: For More Than Boats

What is it?
- Rowing is any kind of pulling done in the horizontal plane.

Why should I care?
- Given the nature of our modern lives, rowing is critical. We spend a significant amount of the day flexed at the spine over keyboards, cell phones, steering wheels, etc.  Rowing gives us an opportunity to strengthen the muscles responsible for holding us upright.


How to?
- As always, neutral spine is key.  If you were to freeze at any point in a rowing exercise and a PVC pipe were placed along your spine, would it make contact with the back of your head, between your shoulder blades, and just above your butt?

- Assuming you have established a neutral spine, all you need to focus on is drawing the weight toward you, stopping when your upper arm is inline with your body.  Now, allow the weight to drift away from you, finishing when your shoulder blades glide apart.  As with push ups, it is vital to allow your shoulder blades to pass through their complete range of motion.

Cues
- Begin by letting the weight lightly pull your shoulder blades apart
- Initiate the movement by drawing your elbows back and shoulder blades together
- Stop when your upper arm is inline with your body
- Lower weight to starting point where shoulder blades are being pulled apart

Variations
- Bent Over Row
- TRX Inverted Row
- Chest Supported Row
- Cable Horizontal Row


...and because sometimes its easiest to learn how not to do things, here is Eric Cressey on how to screw up a row.


Thoughts on rowing from some smart folks
- Wanna Grow? Gotta Row by Mike Robertson
- Row Right by Mike Robertson
- Row Row Row Your Back by Tony Gentilcore